Classroom
Autumn Leaves Crumpled Paper Art: A Froissage Project
Written by Froissage Editorial Team · Updated
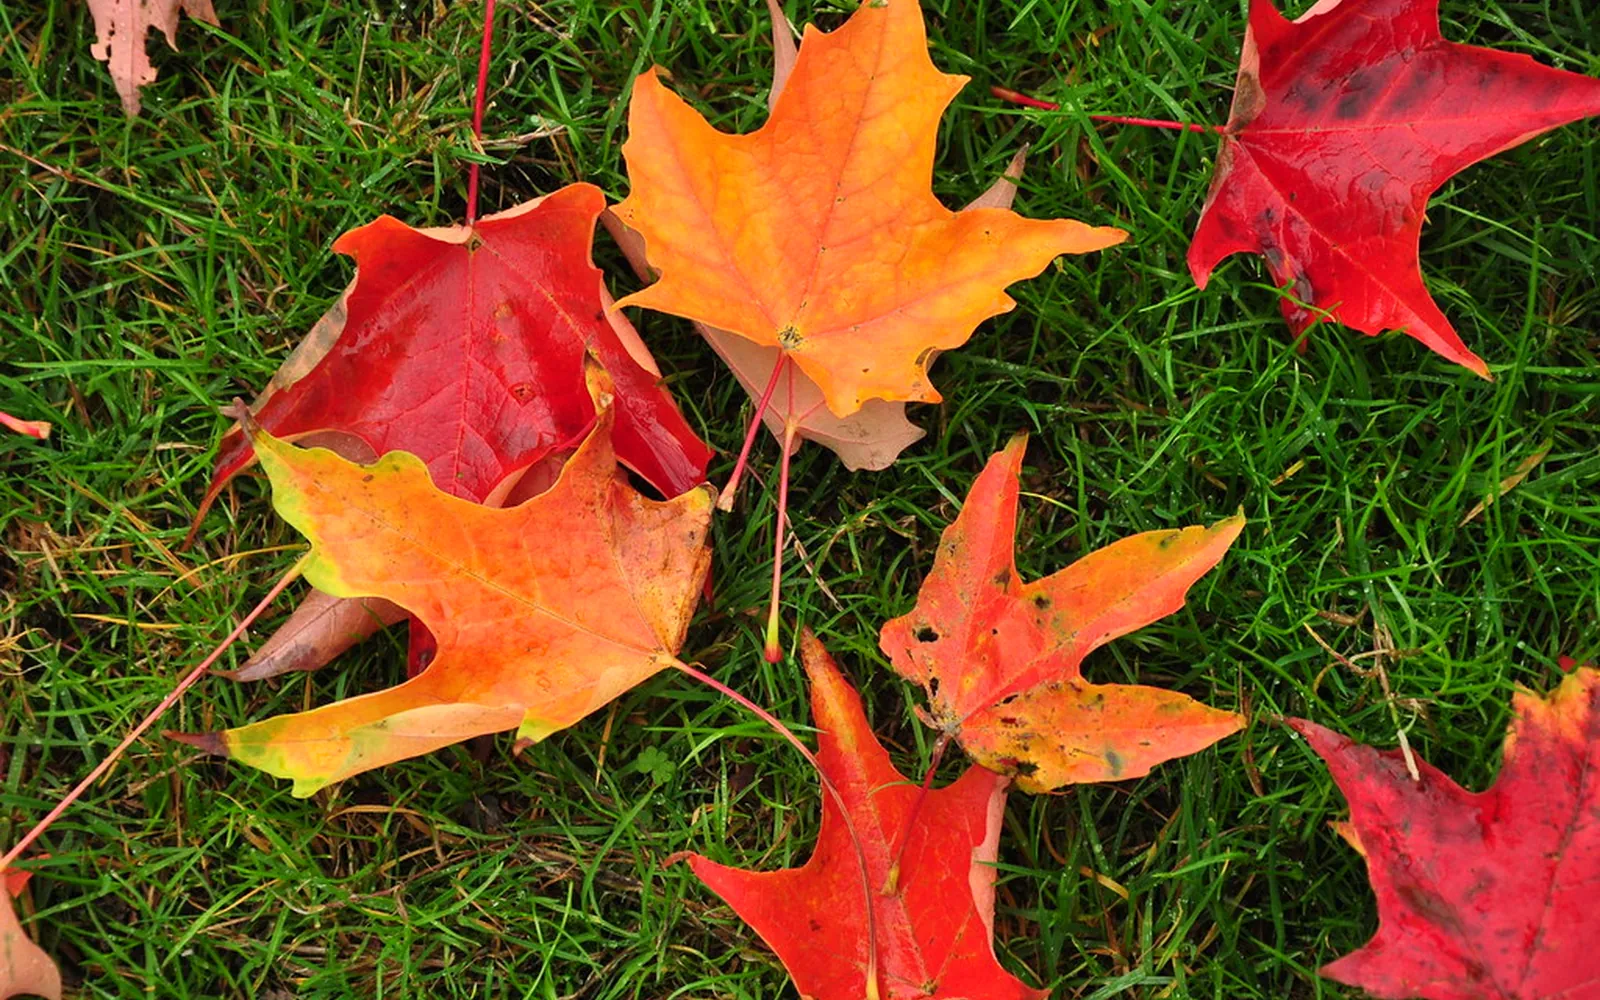
Autumn leaves crumpled paper art is a simple froissage project with a very satisfying result. You crumple a sheet of paper, wash it with autumn colours, and when it dries the creases have turned into a network of darker lines. Cut a leaf shape from it and the creases already look like veins. With a fine pen and a little looking, every leaf becomes individual. This guide covers the materials, the steps, ideas for display and a short piece of leaf science to go with it.
Why crumpled paper makes good leaves
When paper is crumpled, its fibres break along each fold. Those broken lines soak up paint faster than the flat areas, so a wash of colour comes out darker along the creases. A real leaf has a similar structure: a main vein, smaller veins branching from it and patches of colour in between. Froissage artists use the same effect to find figures and landscapes in crumpled sheets; here, we look for veins. If you are new to the technique, read what is froissage or follow the basic how to do froissage guide first.
Materials
- Cartridge or drawing paper, around 120-160 gsm, A4 or larger
- Watercolour paints or liquid watercolour in yellow, orange, red and brown
- A large soft brush and a pot of water
- A fine black or brown pen (waterproof if you will add more paint later)
- Scissors and a glue stick
- Optional: real fallen leaves to use as templates or for rubbings, wax crayons, a sheet of dark card for the background
Our guide to froissage materials explains why some papers crumple better than others.
Step by step
1. Crumple. Squeeze the sheet into a tight ball, then open it and smooth it out. Crumple it a second time for a denser network of lines.
2. Paint. Brush clean water lightly over the sheet. Drop in yellow first, then orange and red, and touch a little brown into a few creases. Let the colours run into each other; do not mix them on the paper.
3. Dry. Leave the sheet flat to dry. When it is dry, the creases will be clearly darker than the ridges.
4. Choose and cut leaves. Turn the sheet over and trace real leaves or draw simple shapes: a maple with five points, an oak with rounded lobes, a beech oval. Choose positions where a long crease will run down the middle of the leaf. Cut them out.
5. Draw veins. On the coloured side, go over the central crease with a fine pen as the main vein, then follow smaller creases outwards as side veins. Stop when the leaf looks alive; too many lines make it look like a map.
6. Assemble. Arrange the leaves on dark card, a painted branch or a paper-plate ring, overlapping some and letting others “fall” towards the bottom of the sheet.
Adding a frottage comparison
A good extension is to make a leaf rubbing beside each crumpled leaf. Place a real leaf, vein side up, under thin paper and rub over it with the side of a wax crayon. This is frottage, the technique Max Ernst developed in 1925; Tate describes it as creating a rubbing of a textured surface. Pupils can then compare the real veins recorded by rubbing with the imagined veins found in the creases. Our guides to the frottage art technique and to froissage vs frottage explain both methods.
The science of autumn colours
The project is a natural way into a short science discussion. A green leaf is green because of chlorophyll, the pigment that captures light for photosynthesis. During the growing season the tree keeps replacing its chlorophyll, and its green masks the other pigments in the leaf. As days shorten and temperatures cool, the tree stops replacing it. The green fades and carotenoids, yellow and orange pigments that were there all along, show through. Some trees also produce anthocyanins in autumn, which give reds and purples. Brown appears as cells die and other compounds form.
Ask pupils to sort real fallen leaves by colour and match their crumpled-paper palette to them. Which colours came from pigments that were already in the leaf, and which were made in autumn?
Display ideas
- Autumn tree: paint a bare trunk and branches on a large sheet and let each pupil add three leaves.
- Wreath: cut the centre from a paper plate and glue overlapping leaves around the ring.
- Falling leaves mobile: punch a hole in each leaf and hang them at different heights from a stick.
- Leaf and rubbing pairs: mount each crumpled leaf next to its frottage twin with a short label.
Our page on how to display froissage art has practical tips for hanging paper work in classrooms. Paper art fades in strong sunlight, so avoid a south-facing window if you want the colours to last through the season; the Library of Congress recommends minimal light exposure for works on paper.
Leaf shapes to try
Using real leaves as models makes the project more interesting and adds an observation element. Collect a few on a walk and compare their outlines before cutting:
- Maple: five pointed lobes radiating from the stem, with veins running out from one point like the fingers of a hand. The crease network on a crumpled sheet rarely does this on its own, so draw the main veins first and let the creases fill in between.
- Oak: rounded lobes along a central vein, with side veins running into each lobe. Easy to cut and good for younger children.
- Beech and birch: simple oval shapes with straight, parallel side veins. They show how regular some leaves are compared with the random creases.
- Ginkgo: a fan shape with fine veins spreading from the stem and no central vein, if you can find one in a park or street.
Lay a real leaf next to the cut paper one and ask pupils to compare: which lines are the same, which are different, and why the paper “veins” wander more than real ones? This kind of side-by-side looking is the same skill practised in how to draw crumpled paper, where a crumpled sheet becomes a still-life subject.
Troubleshooting
- Colours turned brown. Too many colours mixed while wet. Use two or three neighbouring colours, such as yellow and orange or orange and red, and add a darker colour only after the first has dried.
- Creases do not show. The paper was crumpled too lightly or is too thick. Crumple again firmly, or use thinner paper of about 80 to 120 gsm.
- Paper tore when cutting. It was still damp. Let the sheet dry completely and press it flat under a book before cutting.
- Pen lines bleed. Use a waterproof fine liner, and only once the paint is fully dry.
Extending the project
For older pupils, combine the leaves with a crumpled paper landscape painting of an autumn hillside, or use the same crumpled sheets for crumpled paper printing in reds and oranges. In late October the project leads neatly into our Halloween froissage monsters, and for more classroom-ready variations see crumpled paper art ideas. For a background of falling leaves, try bubble painting in yellows and oranges and glue the finished paper leaves on top.
Frequently asked questions
How do you make autumn leaves from crumpled paper?
Crumple a sheet of paper, flatten it, wash it with watercolour in yellows, oranges and reds, and let it dry. Draw leaf outlines on the back, cut them out and go over the darkest creases with a fine pen to make veins.
What paper is best for crumpled paper leaves?
Cartridge or drawing paper of about 120-160 gsm crumples well and takes watercolour without tearing. Thin printer paper also works with liquid watercolour, but it cockles more.
Can I use real leaves in the project?
Yes. Use real leaves as templates to trace, or make crayon rubbings of them next to your crumpled leaves. Collect fallen leaves only, and wash hands afterwards.
Why do leaves change colour in autumn?
During the growing season green chlorophyll masks the other pigments. In autumn the tree stops replacing its chlorophyll, so yellow and orange carotenoids show through, and some species also make red and purple anthocyanins.
What age is this project for?
Children from about five can crumple, paint and cut simple leaf shapes with help. Older children can draw detailed veins, make wreaths and label leaf types.
My leaves look flat. How do I make them look more real?
Draw a main vein first, following the strongest crease, then add smaller veins branching from it. Add a slightly darker wash near the stem and along one edge, and leave a few pale patches where the light would catch the leaf.
Sources
Editorial team
The Froissage.com editorial team researches the history of froissage from museum, encyclopedia and publisher sources and writes practical guides to the technique.