Technique
Frottage Art Technique: Max Ernst's Rubbing Method
Written by Froissage Editorial Team · Updated
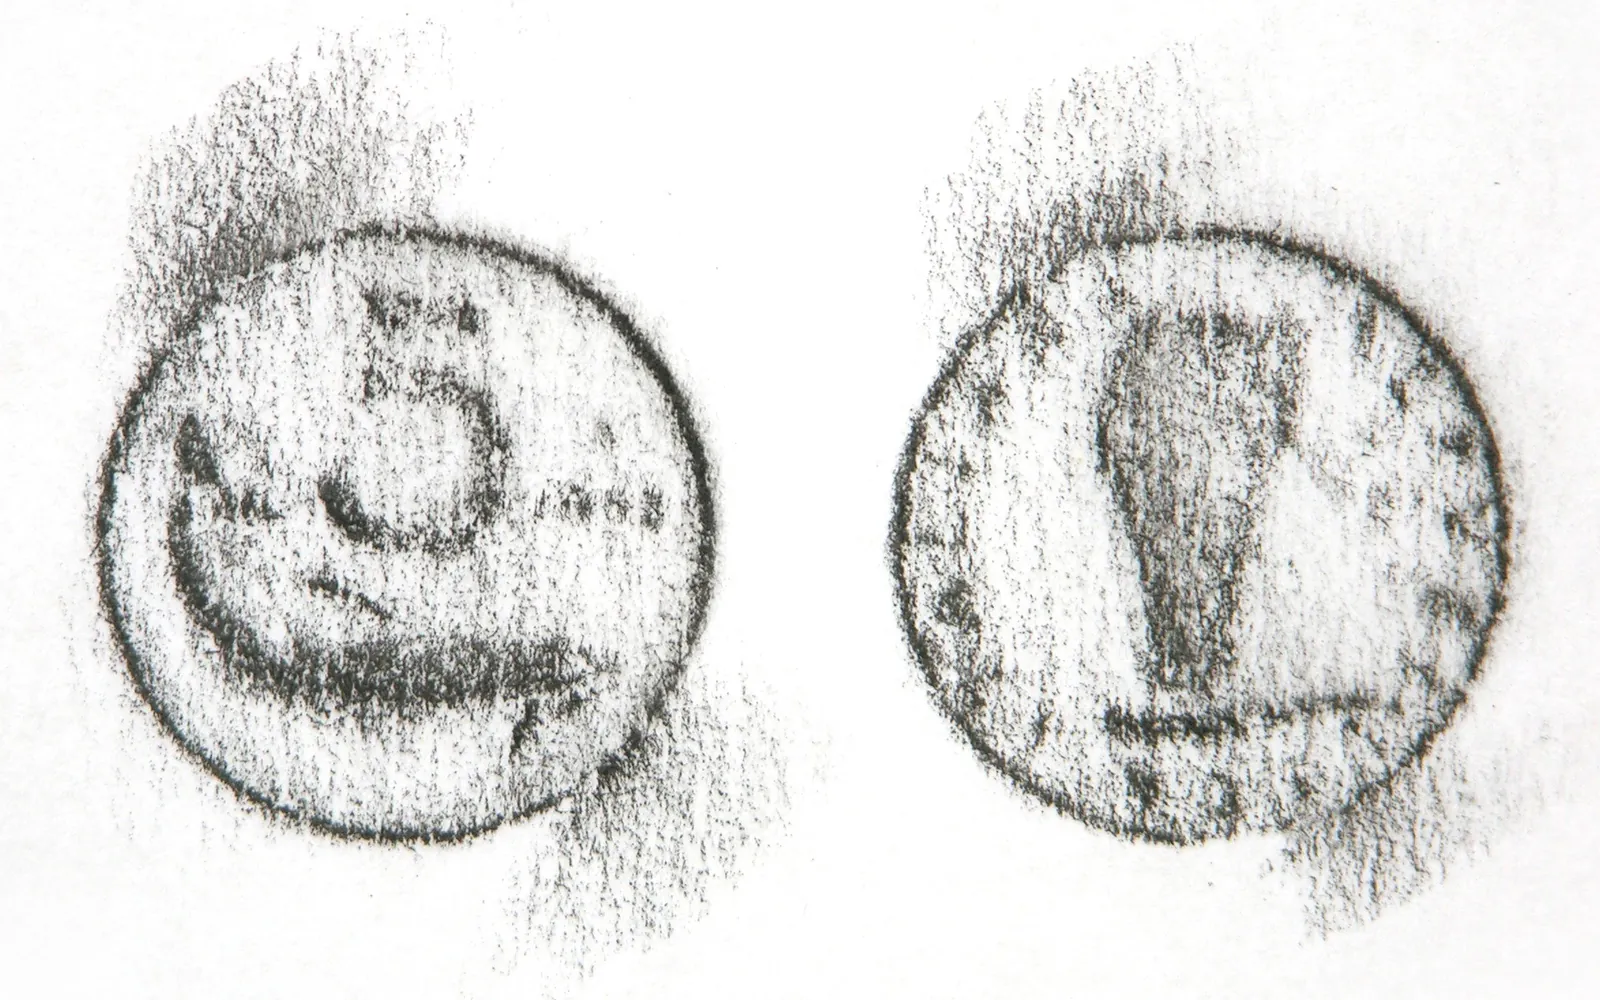
The frottage art technique is the art of rubbing. You lay a sheet of paper over a textured surface, rub it with a soft pencil or crayon, and the texture appears on the paper as if by magic. Children discover it with coins and leaves; the Surrealist painter Max Ernst turned it into a method for inventing forests, birds and strange landscapes. This guide explains how frottage began, how to do it well, and how to turn a pile of rubbings into a finished picture.
What frottage is
Frottage is French for “rubbing”. Wikipedia describes it as reproducing the texture of a surface by placing paper over it and rubbing with a medium such as charcoal or pencil. The same principle is behind much older practices such as brass rubbing in churches and rubbings of inscriptions on stone, which were made to copy a surface faithfully.
Frottage as an art technique has a different aim. The artist is not trying to record the surface but to discover images in it. A rubbing of wood grain is just wood grain until you turn it sideways and see waves, hills or the feathers of a bird. Then you start drawing.
How Max Ernst discovered frottage
According to Tate, Ernst developed frottage in drawings he made from 1925. He was inspired by an old wooden floor whose grain had been brought into relief by years of scrubbing. He laid paper on the boards and rubbed it with a soft pencil, and the results suggested mysterious forests peopled with bird-like creatures.
In 1926 Ernst published a selection of these drawings as a portfolio called Histoire naturelle (Natural History). MoMA describes its prints as collotypes after frottage, from a portfolio of 34. The plates turn rubbed textures into landscapes, creatures and plants that never existed.
Ernst then carried the idea into oil painting. Tate explains that in grattage, which he used from 1927, a canvas covered with paint is laid over a textured object and the paint is scraped off; in Forest and Dove (1927) the trees appear to have been made by scraping over the backbone of a fish.
Ernst’s works are still in copyright, so we do not reproduce them. MoMA’s online collection shows the Histoire naturelle plates.
Materials
- Paper: thin to medium paper picks up texture best: printer paper, newsprint, layout paper or thin drawing paper. Thick watercolour paper hides fine detail.
- Medium: anything soft and broad. A graphite stick or a 4B-8B pencil held on its side, wax crayons with the wrapper removed, charcoal, conté or oil pastel.
- Textures: wood grain, bark, leaves (veined side up), coins, keys, lace, net bags, woven baskets, corrugated card, embossed wallpaper, shoe soles, brick.
- Extras: masking tape to hold the paper still, scrap paper for masking, a fine pen for details and fixative for graphite or charcoal.
Techniques that make a difference
Rub in one direction. Back-and-forth scribbling blurs the texture. Short strokes in a single direction give crisp results.
Use the side, not the point. The broad edge of a crayon or graphite stick touches only the raised parts of the surface, which is what creates the image.
Vary the pressure. Light pressure gives a ghostly impression; heavy pressure gives strong contrast. Changing pressure across a sheet creates depth.
Layer textures. Rub one texture, move the paper, rub another on top. Leaves over wood grain can become a forest at dusk.
Change colour. A light crayon rubbing followed by a darker one on a different texture produces two readable layers.
Combine with wash. A wax-crayon frottage resists watercolour, so a thin wash over the top fills the background and makes the rubbing glow.
From rubbings to a picture
The step most beginners skip is interpretation. Make a sheet of test rubbings first, then spend time looking. Turn the sheet upside down and sideways. Ask what each texture could be: water, fur, a rocky hillside, rain, feathers, a starry sky. This habit of seeing images in random patterns is the same one at work in froissage and in the inkblots of earlier centuries, explored on our page about pareidolia in art.
Then compose. Sketch a light outline of a landscape or creature and rub a different texture into each area, masking the edges with scrap paper. Finish with a few drawn details: an eye, a horizon line, a small figure for scale. A few precise marks are enough to turn texture into a scene.
Frottage and froissage together
Frottage and froissage are close cousins. Frottage takes its texture from the outside world; froissage creates texture in the paper by crumpling it. You can combine them: crumple and flatten a sheet, then make a frottage on it, and the crease network and the rubbed texture overlap. Our comparison of froissage vs frottage explains the differences, and the step-by-step froissage guide covers the crumpling method.
Common problems and fixes
- The paper slides. Tape the corners to the table, or to the object itself if it is flat, before rubbing.
- The image is grey and even. The surface has too little relief, or the paper is too thick. Choose a surface with stronger texture and use thinner paper, such as copy paper or layout paper.
- The paper tears. The surface has sharp edges or the pressure is too heavy. Use a softer crayon and lighter pressure, and avoid metal edges.
- Smudging. Graphite and soft pencil smudge easily. Lay a clean sheet under your hand while working and spray finished rubbings with fixative outdoors, or use wax crayon, which does not smudge.
- Everything looks the same. You used one texture for the whole picture. Assign a different texture to each area: wood grain for sky, a leaf for trees, mesh for water.
Frottage with other chance techniques
Frottage combines well with methods that add colour, because a rubbing is mainly about texture and line. Wax-crayon rubbings resist water, so a wash of colour, a sprinkle of salt as in the watercolor salt technique, or a light bubble painting layer can go on top without hiding the texture. You can also work the other way round: make a loose drip painting or blow painting first, let it dry, and rub textures over it in a dark crayon to pull a picture out of the drips. Max Ernst himself moved from frottage on paper to grattage on canvas, scraping paint over textured surfaces, so mixing methods is entirely in the spirit of the technique.
Frottage in the classroom
Frottage needs no water or paint and works with very young children. A typical session moves from a texture hunt around the school, to a sheet of test rubbings, to a final composition. Older pupils can study Ernst’s approach and then invent their own “natural history” of imaginary plants and animals. For a broader lesson on chance methods, see our Surrealist art techniques overview and the froissage lesson plan.
Frequently asked questions
What is the frottage art technique?
Frottage is a drawing technique in which paper is placed over a textured surface, such as wood grain, leaves or fabric, and rubbed with a soft pencil, crayon or charcoal. The texture appears on the paper, and the artist then develops it into an image.
Who invented frottage?
Rubbing to copy surfaces is old: brass and stone rubbings are a long tradition. As a method of making new images it was developed by Max Ernst, who began using it in drawings in 1925 and published a series of them in 1926 as Histoire naturelle.
What is the best pencil for frottage?
Use something soft and broad: a 4B to 8B graphite stick or pencil held on its side, a wax crayon with its paper removed, charcoal or oil pastel. Hard pencils scratch the paper instead of picking up texture.
What is the difference between frottage and grattage?
Frottage rubs a dry medium over paper on a textured surface. Grattage, which Ernst developed in 1927, is its oil-painting version: a canvas covered with paint is laid on a textured object and the paint is scraped away.
How is frottage different from froissage?
Frottage records the texture of something underneath the paper. Froissage creates texture in the paper itself by crumpling it. Our froissage vs frottage page compares them in detail.
Why are my frottage rubbings blurry?
Usually the paper moved, or the rubbing was done back and forth with the point of the pencil. Tape the paper down, use the side of a soft pencil or crayon and rub in short strokes in one direction.
Sources
Editorial team
The Froissage.com editorial team researches the history of froissage from museum, encyclopedia and publisher sources and writes practical guides to the technique.